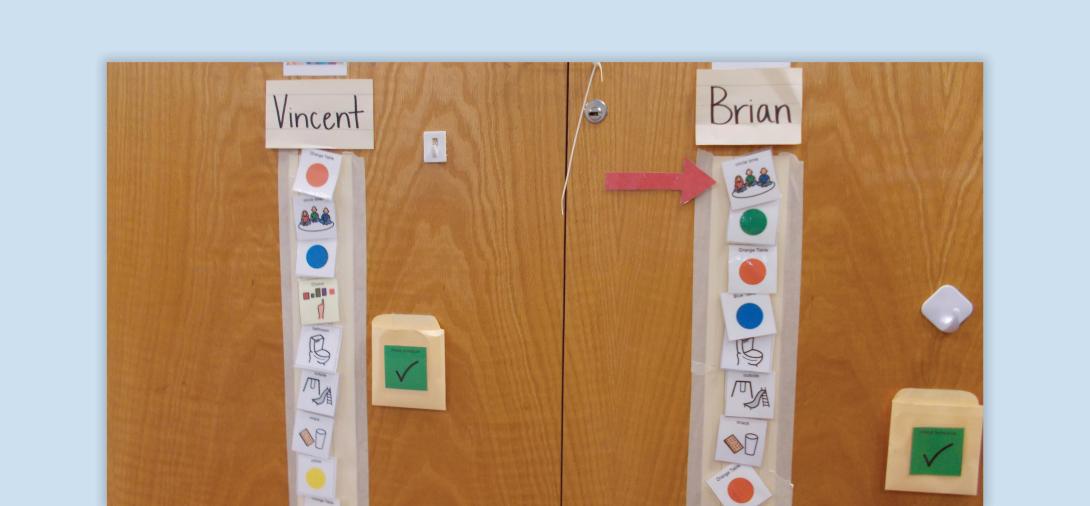
Individual Schedules

List of activities in a student’s day to provide structure, predictability and build independence.
When to use:
- Use for every transition to provide clear expectations of activities, locations, and/or who they will be working with.
- Use to build independence. Use to provide structure and predictability.
How to use:
- List all the student’s activities for their day.
- Decide format for schedule (object, picture, written, or combination) and direction of schedule (top to bottom or left to right). Decide where the schedule will be posted.
- Decide how to cue the student to check their schedule. This can be a verbal cue such as “check schedule” or a transition card.
- Decide how the student will indicate the activity is finished (Finished box/envelope at bottom of schedule, move icon to another side, check off, etc.)
- Decide who will set up the student’s schedule before each school day begins, make needed changes throughout the day, and reset for the next day.
- Teach the student how to use the schedule.
Tips:
- Pictures can be a real photo or from a picture program such as Boardmaker.
- Pictures should be easy for the student to determine the relevant stimuli, free of extraneous elements.
- Individual schedules should reflect the student’s current needs and abilities. For example, when a student learns to read, the pictures can be faded from their schedule.
- Written schedules can be laminated and used with a dry erase marker.
- It is unlikely your students will have the same schedule every day. Consider creating a master that includes each student, for each day. This will make setting up the schedules easier and more efficient.
- Collect data, don’t forget the prompting levels, to help determine when to begin fading prompts, and when to progress to another format (such as object to picture).
How to teach:
- When talking about the schedule with the student, show them the icon and use the target word or phrase to support language and literacy development.
- Provide the prompting level necessary for the student to successfully complete each step.
- Give the student the cue to check their schedule. Use language such as “It’s time to check your schedule.” Walk with the student to the location of their schedule.
- Model for the student how to check their schedule.
- Use language such as “It’s time for Reading.” Provide reinforcement for the student checking their schedule.
- Check data regularly to determine when to fade prompts, or progress to another format. Or, if your student is not progressing, when and how to make necessary teaching adjustments such as increasing prompts and/or reinforcement.
Variations:
- Schedules can be full day or partial day.
- Schedules can be mobile instead of posted, such as a folder schedule, or with the use of technology.

